A well-designed Wi-Fi network can make the difference between seamless streaming and frustrating dead zones. At the heart of this design is optimized access point (AP) coverage—ensuring every corner of your space gets fast, reliable wireless connectivity. Whether you’re setting up a network for a home, office, or large venue, strategic AP placement and configuration are key to maximizing performance.
In this article, we’ll walk through the essentials of designing a Wi-Fi network, from understanding signal behavior to selecting the right tools and standards. Let’s dive into the technical details and practical steps to achieve flawless coverage.
Why Access Point Coverage Matters
Access points (APs) are the backbone of a Wi-Fi network, broadcasting signals that devices like laptops, phones, and IoT gadgets rely on. Poorly placed or configured APs lead to:
- Dead Zones: Areas with no signal (e.g., <-85 dBm).
- Interference: Overlapping signals degrading speed and reliability.
- Overload: Too many devices choking a single AP.
Optimized coverage ensures signal strength stays above -67 dBm (ideal for video streaming) across your space, minimizes interference, and balances device load—delivering speeds up to 4,800 Mbps (WiFi 6) where it counts.
Key Factors in Designing Wi-Fi Coverage
1. Space and Layout
- What It Affects: Signal range and penetration.
- Details: APs typically cover 1,500-2,500 sq ft indoors (line-of-sight: 300 ft), but walls, floors, and furniture reduce this. Concrete cuts signal by 10-15 dB, drywall by 3-5 dB, and glass by 2-3 dB per layer.
- Tip: Map your space—note obstacles and high-traffic areas (e.g., conference rooms).
2. Frequency Bands
- 2.4 GHz: Longer range (150 ft indoors), slower speeds (600 Mbps max on WiFi 5), and more interference (crowded with Bluetooth, microwaves).
- 5 GHz: Shorter range (50-75 ft), faster speeds (1,300 Mbps on WiFi 5, 4,800 Mbps on WiFi 6), less congestion.
- 6 GHz (WiFi 6E): Ultra-fast (9,600 Mbps), short range (40-60 ft), and pristine channels.
- Tip: Use 5 GHz or 6 GHz for speed-critical areas, 2.4 GHz for range.
3. Channel Selection
- What It Affects: Interference between APs and neighboring networks.
- Details: 2.4 GHz has 11 channels (1, 6, 11 non-overlapping in the US), 5 GHz offers 20+ (e.g., 36, 40, 44), and 6 GHz adds 59 (wider 160 MHz channels). Overlap causes co-channel interference, dropping throughput by 20-50%.
- Tip: Stagger channels (e.g., AP1 on 36, AP2 on 48) to avoid overlap.
4. Device Density
- What It Affects: AP capacity.
- Details: WiFi 5 APs handle ~50 devices, WiFi 6 up to 200 via MU-MIMO and OFDMA. High-density spots (e.g., classrooms) need more APs or higher-capacity models.
- Tip: Plan 1 AP per 20-30 devices in busy areas.
5. Power and Placement
- What It Affects: Signal reach and quality.
- Details: Higher transmit power (e.g., 20 dBm) extends range but risks interference. Placement at 6-10 ft height avoids furniture blockage.
- Tip: Avoid corners—center APs for 360° coverage.
Technical Steps to Optimize AP Coverage
Step 1: Site Survey
- Goal: Map signal strength and interference.
- Tools:
- Software: NetSpot, Ekahau (heatmap generation).
- Hardware: Spectrum analyzers (e.g., Wi-Spy) for RF noise.
- Process: Walk the space, measure RSSI (Received Signal Strength Indicator), aim for -50 to -67 dBm in key areas.
- Output: A heatmap showing coverage gaps and overlap.
Step 2: Calculate AP Needs
- Formula: Area (sq ft) ÷ AP coverage (e.g., 2,000 sq ft) + adjustment for density/obstacles.
- Example: A 6,000 sq ft office with moderate walls needs ~3-4 APs on 5 GHz.
- Tip: Add 20% buffer for growth (e.g., new devices).
Step 3: Plan AP Placement
- Guidelines:
- Space APs 30-50 ft apart (5 GHz) or 50-75 ft (2.4 GHz).
- Elevate above obstacles (ceiling mounts ideal).
- Avoid metal surfaces (reflects signals).
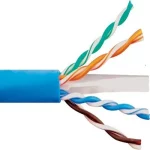
- Tech: Use PoE (Power over Ethernet) with Cat6 cabling for flexible placement (up to 100m runs).
Step 4: Configure Settings
- Channel Width: 20 MHz for 2.4 GHz (less interference), 80-160 MHz for 5/6 GHz (higher speed).
- Transmit Power: Auto-adjust or cap at 17-20 dBm to minimize overlap.
- Roaming: Enable 802.11k/v/r for seamless handoffs between APs.
- QoS: Prioritize voice/video traffic (e.g., VoIP at -50 dBm).
Step 5: Test and Tweak
- Tools: iPerf (speed tests), PingPlotter (latency).
- Metrics: Aim for >100 Mbps throughput, <20 ms latency, <1% packet loss.
- Adjust: Move APs or tweak channels if gaps persist.
Wi-Fi Standards for Optimal Coverage
| Standard | Max Speed (Mbps) | Range (ft) | Channels | Best For |
|---|---|---|---|---|
| WiFi 5 (802.11ac) | 1,300 | 50-75 | 20+ (5 GHz) | Small-medium spaces |
| WiFi 6 (802.11ax) | 4,800 | 50-75 | 20+ (5 GHz) | High-density areas |
| WiFi 6E | 9,600 | 40-60 | 59 (6 GHz) | Ultra-fast, low-latency |
- WiFi 6: Boosts capacity with OFDMA, ideal for 50+ devices per AP.
- WiFi 6E: Adds 6 GHz band for congestion-free performance in urban settings.
Tools and Equipment Checklist
- APs: Ubiquiti UniFi (e.g., U6-LR, $179), Cisco Catalyst ($300+), or consumer-grade (Netgear Nighthawk).
- Cabling: Cat6 for PoE runs (1 Gbps up to 100m, 10 Gbps up to 55m).
- Switches: PoE-enabled (e.g., TP-Link TL-SG2210P, $100) for power and data.
- Software: UniFi Network Management (free), Ekahau Pro ($5K+ for pros).
Real-World Example: Office Design
Scenario: A 4,000 sq ft office with 2 floors, 40 employees, and concrete walls.
- Plan: 3 WiFi 6 APs (5 GHz, 80 MHz channels)—one per floor center, one in high-density meeting room.
- Setup: Channels 36, 48, 149; power at 17 dBm; Cat6 PoE from a central switch.
- Result: >200 Mbps everywhere, -60 dBm signal, supports 60 devices.
Challenges and Solutions
- Interference: Use DFS channels (5 GHz) or 6 GHz to dodge radar/neighbor networks.
- Obstacles: Add APs or mesh nodes (e.g., Eero Pro 6) for thick walls.
- Budget: Start with 1-2 APs ($100-$200 each), scale as needed.
Building a Future-Proof Wi-Fi Network
Designing a Wi-Fi network with optimized AP coverage blends science and strategy. By mapping your space, choosing the right standards (e.g., WiFi 6), and fine-tuning placement and settings, you can deliver fast, reliable connectivity anywhere. Whether it’s a cozy home or a bustling office, the payoff—fewer complaints, happier users—is worth the effort.
Ready to design your network? Grab a heatmap tool and start planning for peak performance today.